
Introduction
In this article, we are going through the steps to generate ASP.NET 5 WebApi Docker image and using Azure Container Registry as a private repository. You can find more details about ACR in this link : https://azure.microsoft.com/fr-fr/services/container-registry/
For today’s example, I am running in Windows 10 OS and using PowerShell for scripting. You can follow the same overall steps in Linux OS as I will be using Docker, and Azure CLI which run as well outside the Windows box.
Before starting digging into details, it is important to have the following items :
- An Azure subscription! If you do not yet have an Azure account you can create an account with a few clicks (https://azure.microsoft.com). Azure is giving away a month’s trial with a $ 200 credit.
- I am using WSL2 in my local machine which is s a compatibility layer for running Linux binary executables natively on Windows 10. If you are running on Linux OS, skip this step.(https://docs.microsoft.com/fr-fr/windows/wsl/about)
- Docker Desktop : https://hub.docker.com/editions/community/docker-ce-desktop-windows
- Azure CLI installed, as we are going to make some scripts to create some Azure resources.
Let’s start our journey 😊
1- Create ASP NET Web API project using dotnet CLI
We will create an ASP.NET 5 Web API project using dotnet CLI. If you are more comfortable using Visual Studio, you can do it as well this way. But on the long run, using the command helps a lot saving time especially in redundant tasks.
Execute the following scripts:
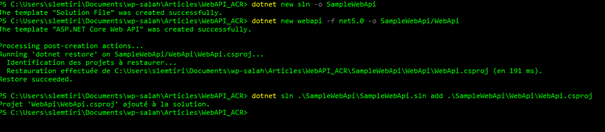
dotnet new sln -o SampleWebApi
dotnet new webapi -f net5.0 -o SampleWebApi/WebApi
dotnet sln .\SampleWebApi\SampleWebApi.sln add .\SampleWebApi\WebApi\WebApi.csproj
The first line of the script creates the solution file. The second one creates a new project template for ASP.NET 5 Web APi targeting framework 5. The final step is used to add the project to the solution file. If everything is OK, you will have something equivalent to :
Open your favorite IDE and, optionally, add these two lines in the method Configure (Class Startup.cs); mainly to make sure we have the Swagger functionality available in the production environment.
public void Configure(IApplicationBuilder app, IWebHostEnvironment env)
         {
             if (env.IsDevelopment())
             {
                 app.UseDeveloperExceptionPage();
                 app.UseSwagger();
                 app.UseSwaggerUI(c => c.SwaggerEndpoint("/swagger/v1/swagger.json", "WebApi v1"));
             }
         // Add these two lines         app.UseSwagger();         app.UseSwaggerUI(c => c.SwaggerEndpoint("/swagger/v1/swagger.json", "WebApi v1"));
Debug the application locally just to make sure that everything is working as expected.
2- Create the Docker files and generate the Docker image
In the next step, we are going to create 2 Docker files in root directory of our project : “.dockerignore” and “Dockerfile”.
The file .dockerignore is meant to ignore some directory and files that Docker should ignore during the build process. That is very useful for performance purposes , especially if the files are too big and not used by the application during the runtime.
Edit the “.dockerignore” file with the following ( see below),then save it:
 **/.classpath
 **/.dockerignore
 **/.env
 **/.git
 **/.gitignore
 **/.project
 **/.settings
 **/.toolstarget
 **/.vs
 **/.vscode
 **/*.*proj.user
 **/*.dbmdl
 **/*.jfm
 **/bin
 **/charts
 **/docker-compose*
 **/Dockerfile*
 **/node_modules
 **/npm-debug.log
 **/obj
 **/secrets.dev.yaml
 **/values.dev.yaml
 **/out
 **/TestResults
 LICENSE
 README.md
Edit the Docker file with the following content:
 FROM mcr.microsoft.com/dotnet/sdk:5.0 AS build-env
 WORKDIR /app
 EXPOSE 80
 EXPOSE 443

 # Restore
 WORKDIR /src
 COPY . .
 RUN dotnet restore "WebApi/WebApi.csproj"

 # Build
 WORKDIR "/src/WebApi"
 RUN dotnet build "WebApi.csproj" --no-restore -c Release -o /app/build

 # Publish
 RUN dotnet publish "WebApi.csproj" -c Release -o /app/publish

 # Runtime image
 FROM mcr.microsoft.com/dotnet/aspnet:5.0
 WORKDIR /app
 COPY --from=build-env /app/publish .
 ENTRYPOINT ["dotnet", "WebApi.dll"]
Here below the explanation of the Docker entries:
Lines 1-4 :
 FROM mcr.microsoft.com/dotnet/sdk:5.0 AS build-env
 WORKDIR /app
 EXPOSE 80
 EXPOSE 443
Line 1 : Pull the dotnet SDK image to execute the dotnet CLI commands.
Line 2 : Switch to directory /app. (This command creates the folder /app if it is not already created).
Line 3 : Expose the port 80 of the container.
Line 4 : Expose the port 443 of the container.
Lines 6-16 :
 # Restore
 WORKDIR /src
 COPY . .
 RUN dotnet restore "WebApi/WebApi.csproj"

 # Build
 WORKDIR "/src/WebApi"
 RUN dotnet build "WebApi.csproj" --no-restore -c Release -o /app/build

 # Publish
 RUN dotnet publish "WebApi.csproj" -c Release -o /app/publish
Line 7: Create the directory /src
Line 8: Copy the source files from the host system to the image.
Line 9: Execute the command dotnet restore to get the nugget packages.
Line 12: Switch to directory /src/WebApi
Line 13: Run the dotnet build and output the files to /app/build
Line 16: Run the dotnet publish and output the files to /app/publish
Line 18-22
 # Runtime image
 FROM mcr.microsoft.com/dotnet/aspnet:5.0
 WORKDIR /app
 COPY --from=build-env /app/publish .
 ENTRYPOINT ["dotnet", "WebApi.dll"]
Line 19: Pull the runtime image for dotnet 5
Line 20: Switch to directory /app
Line 21: Copy the published items from the previous build-env to app/publish.
Line 22: Execute the dotnet Web API
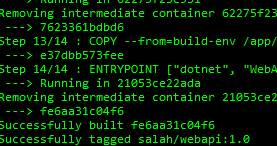
Now, we are ready! Execute the following command to build our Docker image:
docker build -t salah/webapi:1.0 .If everything is OK, you will have something like this at the end of the execution of your build command.
3- Test locally the application using Docker
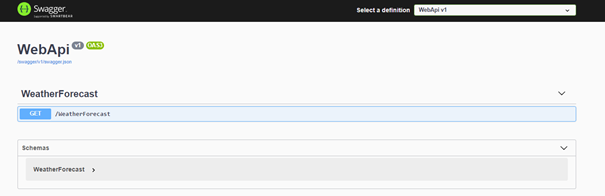
Execute the following command to run the docker image locally :
docker run -d -p 8099:80 --name webapi_instance salah/webapi:1.0Open the link http://localhost:8099/swagger on your browser. You should see the Swagger UI.
4- Create the Azure Container Registry
Now that we have our image ready, we can move to create our private registry to host our images.
Open your Script tool (bach or PowerShell depending on your OS) and follow the steps below :
A- Connect to Azure using your account. A page will be opened and prompt you to enter your credentials.
az loginB- Create the resource group
 $rg = "web-api-sample-rg"
 az group create --location westeurope --name $rg
Tip : You can choose another region based on your location. Execute the command below to check all available regions : az account list-locations
C- Create the ACR
az acr create --resource-group $rg --name webapisampleacr --sku Basic5- Push the image to ACR
You must authenticate your machine to your newly created ACR. Execute the following command :
az acr login --name webapisampleacrYou should get the message “Login succeeded”:

According to Microsoft documentation, you must tag the image created earlier with your ACR as prefix. Make a tag to the image as described below :
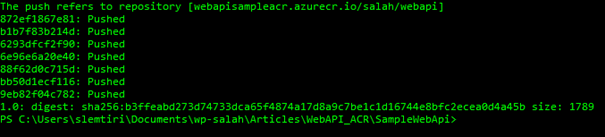
docker tag salah/webapi:1.0 webapisampleacr.azurecr.io/salah/webapi:1.0Finally push the image with the Docker command:
docker push webapisampleacr.azurecr.io/salah/webapi:1.0If everything was executed correctly, you should see the upload in progress and a success confirmation at the end.
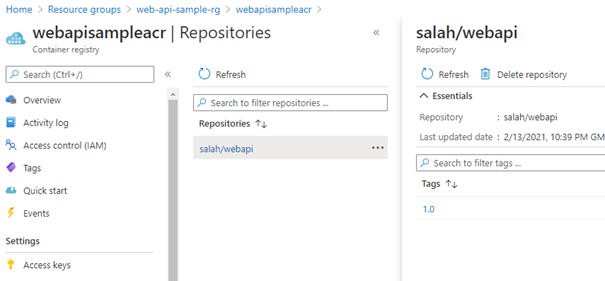
6- Check your images in Azure Portal
Connect to Azure portal and go to the subscription you created earlier.
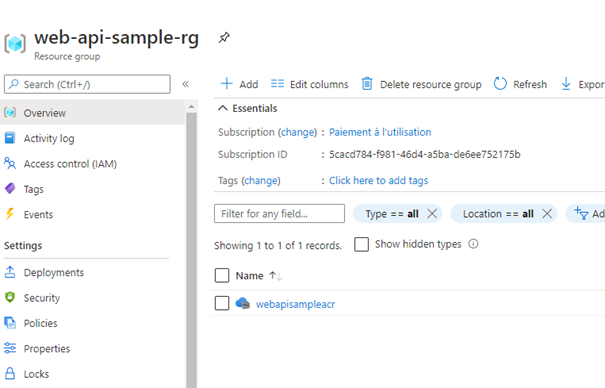
Access webapisampleacr and click on repositories. You will find out that your image was pushed correctly.
Final words …
In this tutorial, we have seen how we have started creating ASP.NET 5 WebAPi application , generating the Docker file, then building the image, and lastly pushing it to a private repository in Azure.
I hope this topic was helpful for people who would like to start using Docker for ASP.NET and / or using ACR as private registry in Azure.
Leave a comment if you find this article useful and I will be pleased to answer your questions if you have any problem.
Salah.
Concrete
Well